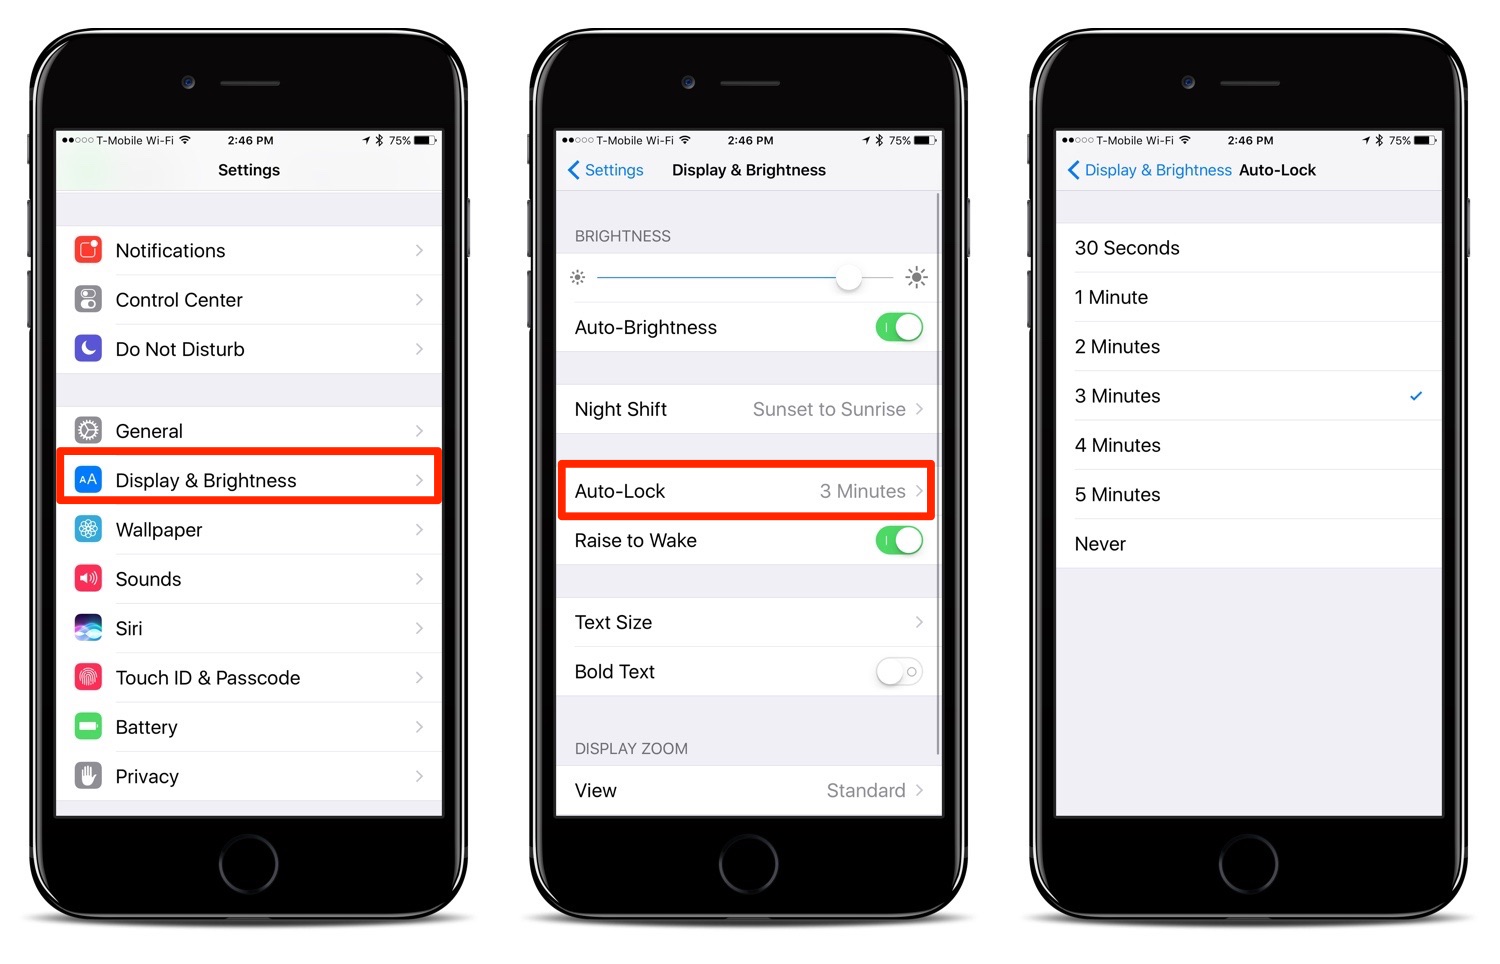
Auto-Lock on your iPhone (and iPad) is a handy setting that controls the amount of time that passes before your device’s screen dims, in order to conserve battery life. If you find your iPhone’s screen is dimming too quickly, not quickly enough, or not at all, follow the simple steps below to adjust the Auto-Lock setting.
How to Change the Auto-Lock Setting on Your iPhone or iPad in iOS 10 or Higher

- Tap the Settings icon on your device’s Home Screen.
- In the Settings menu, tap the “Display & Brightness” menu option.
- In the Display & Brightness menu, tap “Auto-Lock.”
- On the Auto-Lock screen, tap the amount of time that you think will work best for you. Options run from 30 Seconds to 5 Minutes. You can also tap “Never,” but that basically does just the opposite of what we’re trying to achieve.
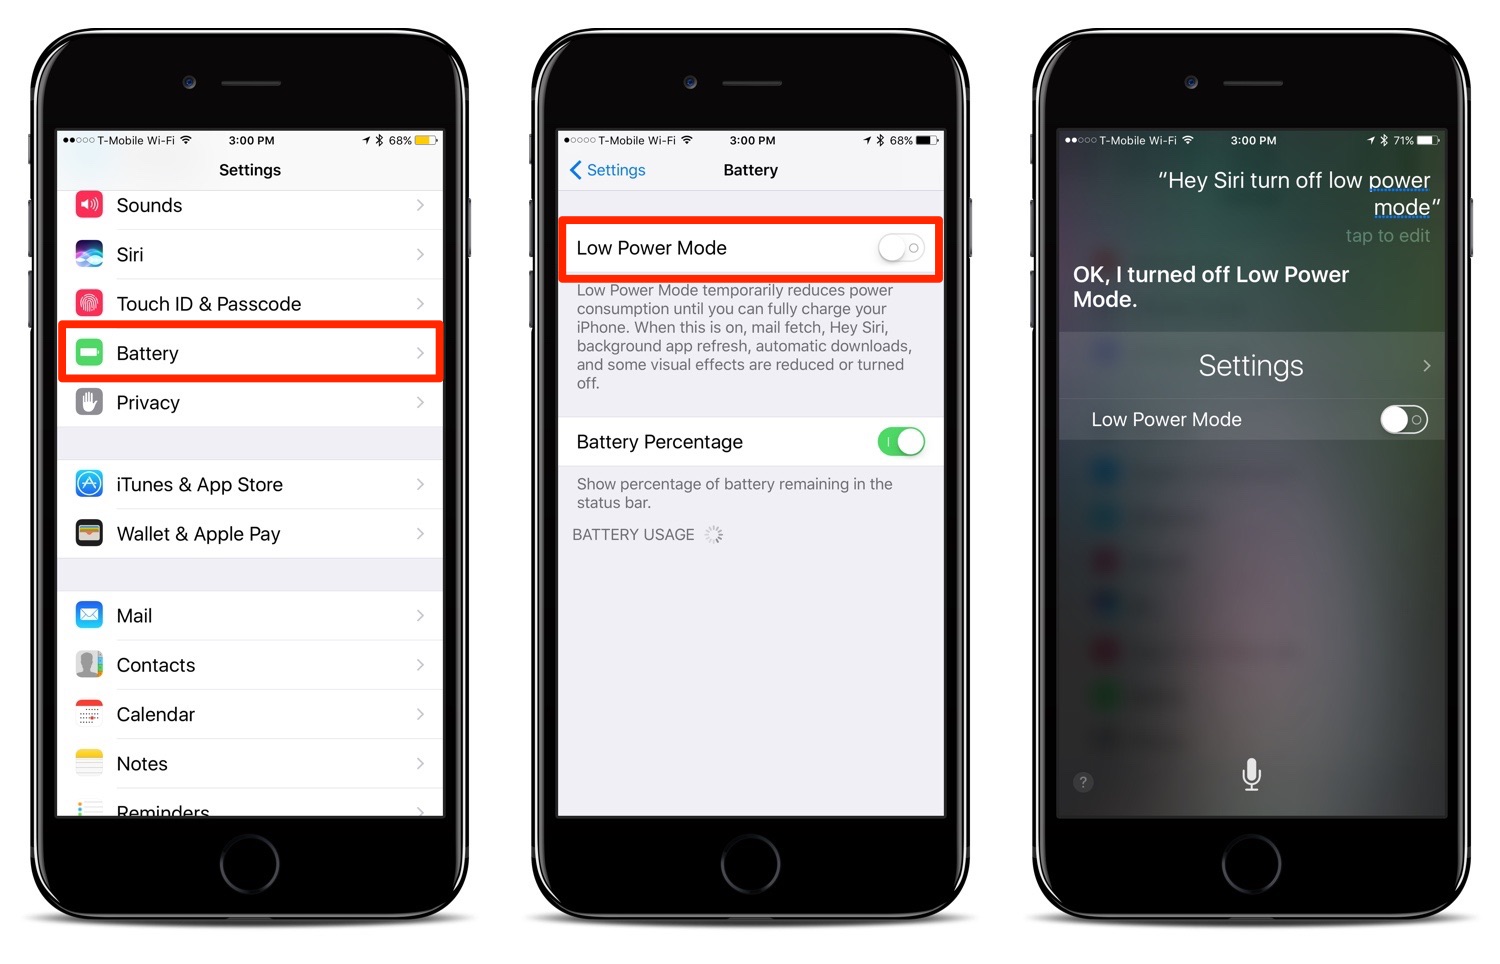
You might find that Auto-Lock is grayed out on your device. Don’t freak out. You can fix that with just a couple of taps. Or… No taps at all!

- Tap the Settings icon on your device’s Home Screen.
- In the Settings menu, tap the “Battery” menu option.
- On the “Battery” screen, you’ll probably see “Low Power Mode” turned on. Tap the switch to turn it off.
- Or… Simply tell Siri: “Turn off Low Power Mode.” We know, we could have told you this one first, but as Pink Floyd once said, “If you don’t eat yer meat, you can’t have any pudding. How can you have any pudding if you don’t eat yer meat?”
- Go back to Settings and follow the first set of instructions above to adjust your device’s Auto-Lock setting.
While controlling the options for using your iOS device are fairly simple to comprehend, some of the settings are buried under multiple layers of the Settings menu. We hope this “how-to” made things a bit easier for some of you. If you have any questions or would like us to post a particular tutorial for your iOS device, Mac, Apple Watch, or Apple TV, let us know by commenting in the Comments section below. Thanks!

