You had some once in a lifetime vacation photos stored on your camera’s SD card. You thought you’d copied them over to your Mac, and went ahead and deleted them from the card. UH-OH! Now you can’t find them anywhere on your Mac. Pop quiz hotshot, what do you do, what do you do? Enter Tenorshare Card Data Recovery for the Mac.
Overview
Tenorshare Card Data Recovery for the Mac is designed to recover photos, videos, and other documents that have been deleted from memory cards. Tenorshare lists the memory cards supported include SD cards, CF cards, MMC (MultiMedia Cards), XD Picture Cards, SDHCs, MicroSD, MiniSD, Mobile Phone Cards, as well as memory sticks, USB, pen drive, external hard drives. (We only had an SD card handy to test the app with.)
We used the Card Data Recovery app to recover files we had deleted from a JVC Picsio video camera’s 16GB SD card. We attempted to recover files that had been merely deleted from the media, and also attempted to recover following a format of the media.
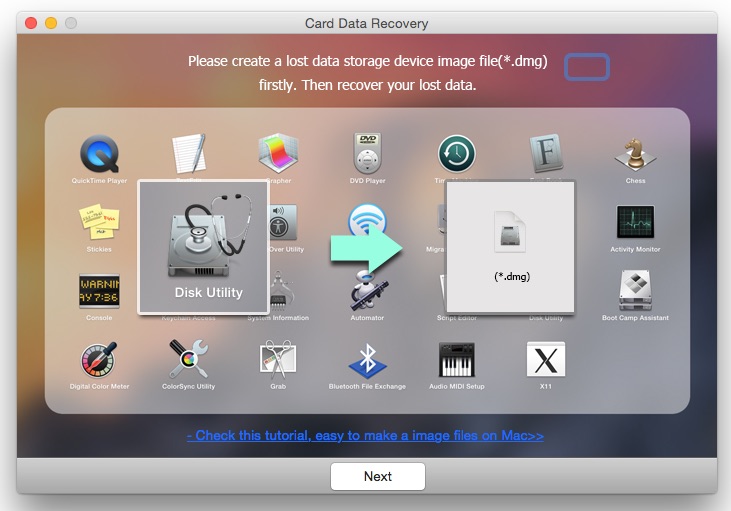
Note: Before you can attempt to recover any data, you must create a disk image of your storage card on your Mac. So it’s good to keep this in mind before attempting a restore. You’ll need enough room on your Mac’s hard drive to hold a disk image of the storage card you’re attempting to recover from. In our tests, we used a 16GB SD card.
Creating a disk image is simple and only take a short amount of time to create. You follow these steps:
- Open Disk Utility on your Mac.
- You will see a list of all the drives on your Mac. Click your mouse pointer on the name of the media card you want to recover data from.
- Choose “File” -> “New” -> “Disk Image from ‘(Name of your storage card)'”.
- Enter a name for the disk image, and select where you’d like to save it. Before clicking “Save,” choose the“read-only” option from the Image Format pop-up menu. Then choose the “None” option from the Encryption pop-up menu.
- Now, click on “Save.”At this point, you will get a dialog asking you to type your Mac’s administrator name and password to allow this change.
Now you’re ready to run the Card Data Recovery app.
I took a batch of photos and videos using the JVC camera, and loaded the card into my Mac’s SD card slot to confirm I could read them on my Mac.
I then popped the card back into my camera, deleted the photos and videos using the JVC’s deletion function, removed the card and popped it back into my Mac’s SD card slot.
Once in the Mac, I confirmed the files were gone by opening it from My Mac’s desktop and searching the directories. All files were gone.
I then followed the above steps, and created a disk image of the SD card. Now, it was time to load the Card Data Recovery app.
Upon loading the Card Data Recovery app, you’re greeted with a reminder to create a disk image. If you forget how, there is a handy link to Tenorshare’s website where they’ll walk you through it. Click “Next.”
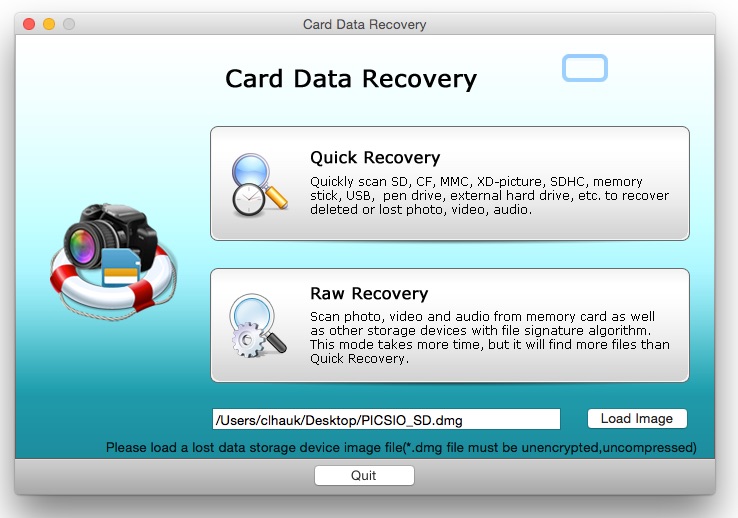
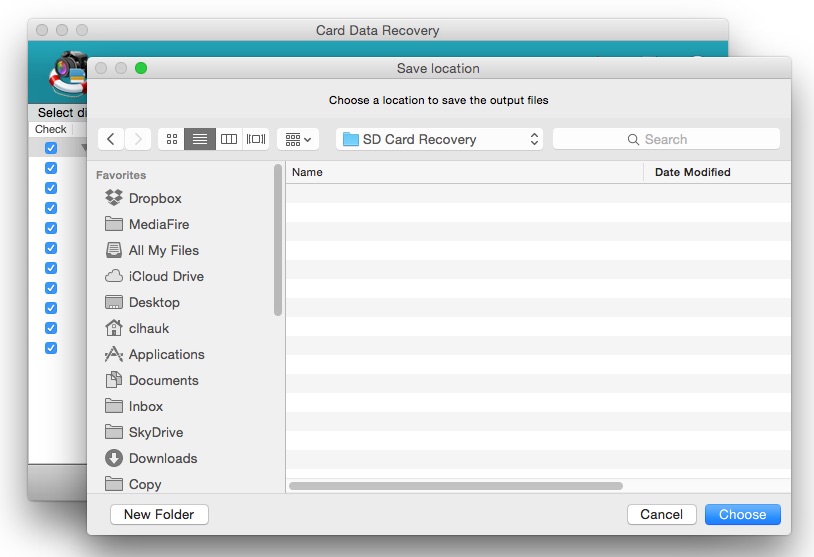
Next, I clicked the “Load Image…” button, and found the disk image I created. There are two options available for data recovery, “Quick Recovery,” which quickly scans for lost files, and “Raw Recovery,” which takes more time as it performs a deeper scan for files. I tried “Quick Recovery” first.
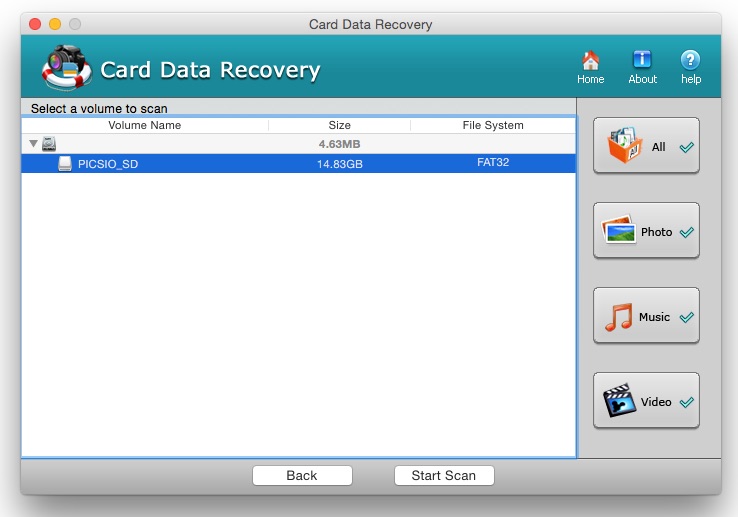
I then clicked the volume name in the directory window of the app, and selected the type of files to look for, “Photo,” “Music,” or “Video,” and clicked the “Start Scan” button.
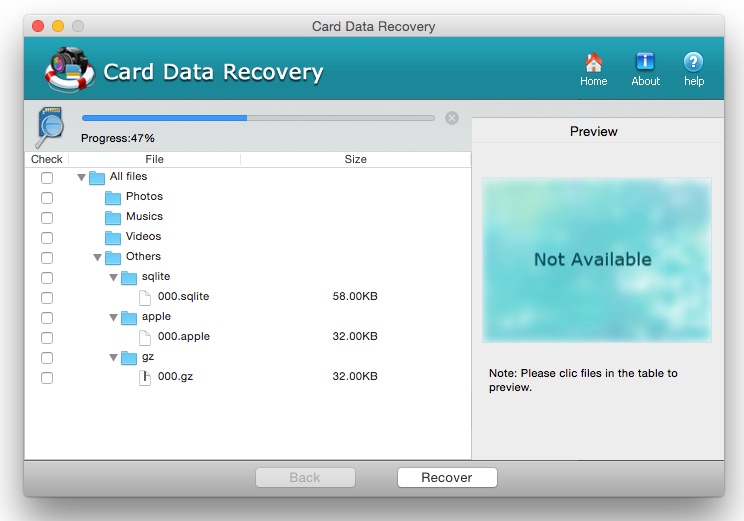
Quick Recovery was unable to find the files. Now it was time for Raw Recovery. I received the same results. Nothing was found.
I repeated the steps for a card I took photos and videos on, and then deleted from the storage card using Finder on the Mac.
This time, after following the steps above, I was unable to recover the photos using Quick Recovery, however Raw Recovery was able to recover the photos. No love for the videos, however, as while it looked as if they were recovered, my video player, (VLC) could not recognize the format and refused to play them.
I did have better results with an SD card that had photos stored on it, which I then deleted via My Mac’s Finder. Each time I attempted recovery from this situation, the app found the photos and recovered them. I did find however, that if I had emptied the trash before attempting a recovery, no photos were found.
Verdict
Sadly, Tenorshare Card Data Recovery for the Mac did not perform as well as I had hoped. I am giving it 3 stars, as it does work in some cases, but perhaps not in the type of situation where you might need it most, when you accidentally delete a photo from a storage card while it is still in the camera.
I challenge Tenorshare to improve the app, and I will be happy to review it again at a later date. I hope they accept my challenge, and offer up an improved version. The app could be of use to users who accidentally delete photos from an SD card from their Mac’s desktop, but that is the only situation where I found data could be reliably recovered.
Rating: [rating:3.0/5.0]
Price: $39.99 – Available in the Mac App Store – The current price is 50% Off, The normal price is $79.95.
Pros:
- Easy to use interface
- Can recover photos in some instances
Cons:
- Can’t recover files when they’ve been deleted by a camera
- The app bombs out from time to time, requiring a restart of the app
*Note: The above review was commissioned by the developer in accordance with our app review policy, and has been written in an objective, unbiased fashion.

