This Mac tip is provided by Mark Greentree and was originally posted on Mark’s blog – Everyday Mac Support. For more of Mark’s tips visit his site, follow him on Twitter, or browse his archive of posts here.
How To: Use And Remove All My Files Finder Window In Mac OS X Lion

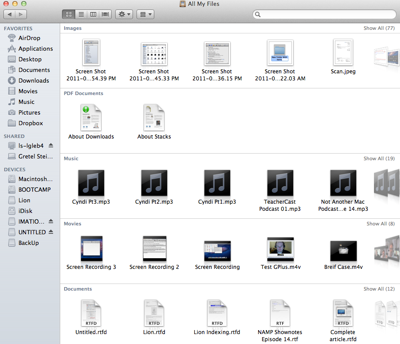
Apple has released a new Finder window view in Mac OS X Lion called “All My Files”. An example of this is shown in the image above and by default will be accessible in a Finder window in the left hand navigation bar at the very top of the favourites area.
Now, I’m not a big fan of moving favourites to the top as I would much prefer to have my series of hard drives presented in that area.
However, I do really like this view. It clearly lays out your images, PDF documents, Music, Movies and Documents from your hard drive and will present the most recent file in question on the left hand side of the screen. You will notice on the right hand side that it has text saying show all and includes the number of files in this specific area. Hence clicking will expand the window out showing you all available files for that area.
Alternatively, you can simply move your mouse pointer to a selected row and use a single finger to scroll towards to the right therefore presenting more files as you go along.
Should you not like this new Finder window you can always disable and remove it from view by going to the Finder preferences.
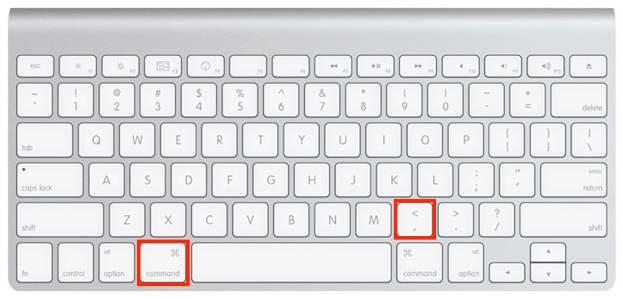
Simply press Command-, (Comma) on your keyboard whilst in the Finder as shown below:

Or navigate to Finder-Preferences from the menu bar at the top of your display.
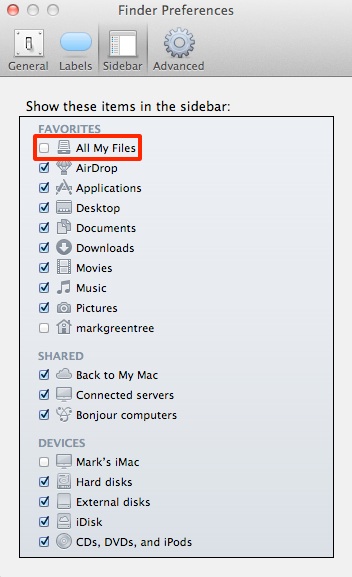
Then make sure you are in the Sidebar tab as shown in the image below:

As you can see from the image above I have highlighted the option of All My Files. By default, this will be turned on and a tick will be located in the box next to this option. However, If you don’t want this option or any other in the list above listed in the Finder window then simply deselect them.
For more helpful tips, check out our full collection of tutorials by visiting our How-To category!


